QuickBooks Desktop is an accounting application that is focused on creating powerful features for its users satisfaction. Since it is such a massive program, it results in the heavy usage of the server and internet. Sometimes, there can be numerous programs running side-by-side with QuickBooks. In such situations, QB can start dysfunctioning and result in a technical fault known as QuickBooks Server Busy Error. The warning text will clear your concept around this error – “This action cannot be completed because the other program is busy.” Let us now move towards the blog and learn the approaches that can be used in order to free up the server for the smooth functioning of QuickBooks.
Are you struggling to find the ways which can resolve the QuickBooks Server Busy Error? we recommend you get in touch with our best-in-market experts at +1 800-579-9430, for the best advice
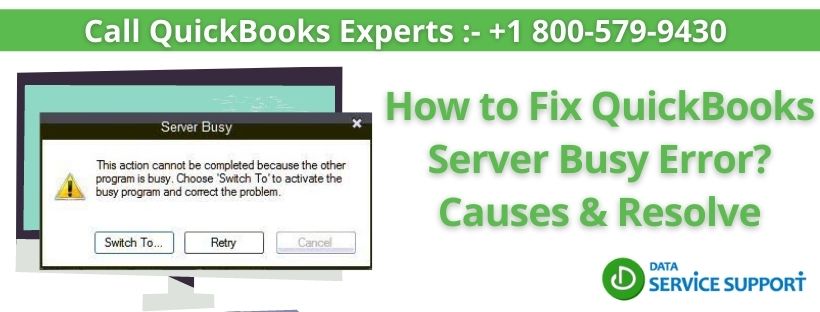
What is Server Busy Error in QuickBooks?
Before you dig in deep and touch the causes to fix QuickBooks desktop server busy, you might first know what the QuickBooks desktop server dynamic error is. This server busy error might appear if QuickBooks run multiple programs in the background and cannot communicate with the QuickBooks server. That time someone running the program is engaged and showing a popup with an error “The action remains incomplete because the other program is busy”.
Significant Causes behind QuickBooks Desktop Server Busy Error
- Inadequate resources provided to the network on which QuickBooks is operating.
- If QuickBooks was not completely shut down in the right manner previously, it can result in QuickBooks error message server busy.
- The error can occur when a user is downloading the Windows updates and also running QuickBooks Desktop simultaneously.
- A no-sync situation with Intuit ProSeries.
- Unresponsive or inactive secondary applications that are functioning alongside QuickBooks.
- A temporary prohibition through the Windows Firewall.
Read more :- QuickBooks Error 17337 | Fixed In Simple Steps
Prominent Fixes for Busy Server Error in QuickBooks
After having a deep conversation on the definition and causes of Server Busy Error in QuickBooks, it is time to gain some knowledge about the practices that are proven to be successful in eliminating the same –
Solution 1 – Terminate the Other Running Applications
For QuickBooks Desktop to function properly, it is important that there are no other applications or programs running alongside. Here we will close all of them –
- Close QuickBooks Desktop.
- Press and hold the Ctrl + Alt + Del keys together to open a menu on the screen.
- Choose Task Manager from the menu to trigger the Task Manager prompt on your screen.
- Go to the Applications tab, click on each task and then hit the End Task button at the bottom.
- Next, move to the Processes section, look for all the QuickBooks.exe programs.
- Click on each of them and then tap on the End Process button.
- Close this window.
- Open QuickBooks and access your company file.
Solution 2 – Download and Install the Latest Windows Update into your System
Yes it is necessary to update Windows, in order to increase the security against the device and also makes it easy for the system to incorporate applications with the latest technology –
- Click on the Start button at the bottom left corner of your screen.
- In the search panel, type Settings and hit the Enter key.
- In the following window, tap on the Windows Update option.
- Then, press the Check for Updates button.
- If there are any updates available, the system will check for it and initiate an Auto Download.
- Once the update is complete, you will have to install it.
- Finally, reboot your computer and open QuickBooks.
Read more :- Steps That Can Effectively Fix MYOB Error 9004
Solution 3 – Disable the Automatic Update Feature in QuickBooks
When multiple applications are running on the system regularly, it is important that you turn off automatic updates in order to minimize the memory usage. This is how –
- Hold the Ctrl +Alt + Del keys on your keyboard to trigger the Task Manager prompt.
- Go to the Startup tab and then select the “QuickBooks Automatic Update” option.
- Hit the Disable button to confirm the action.
- Next, you need to disable the QuickBooks Desktop Shared Updates. This is how –
- In QuickBooks, tap on the Help tab.
- Click on Update QuickBooks and press the Options tab.
- Now, select the No option to turn off the Shared Download option.
- Click on Close.
Solution 4 – Map the Network Drive in Windows
Mapping a network drive creates a fresh environment for the files and folders that were previously stored at a different location. Follow these steps to do so –
- Press the Windows button.
- In the search space, type This PC and hit Enter.
- Double-click on the This PC icon in the list of programs.
- In the window that shows up next, you should be in the Computer tab.
- Click on Map a Network Drive.
- Choose an unused letter for the drive and hit the Browse button.
- Navigate to the location where your QuickBooks files are currently stored.
- Tap on the OK button and then Finish.
- Now when you open QuickBooks, use the new mapped drive to access the company.
Read more :- 3 Easy Tricks to Fix the QuickBooks Error 105!
We have now come to the last part of the blog, where we conclude the details we have shared on the QuickBooks Server Busy Error. If the techniques mentioned above are followed thoroughly, you can definitely get rid of this glitch forever. To clarify your doubts and queries, you can have a word with our certified tech professionals at +1 800-579-9430 round-the-clock.